Field Surveyor
Who you are
You collect the site data. Working from the Jagga Surveyor app, you visit the properties on your route, complete the checklist, capture geotagged photos, and can collect the field-visit fee on site. The app is offline-first: everything you capture is saved on your phone first and uploads by itself when you are back online.
What you can do
- See your assigned visits for the day, in order.
- Start a visit, which locks the checklist version so a later change cannot alter what you captured.
- Complete the checklist, take GPS-tagged photos, and record measurements.
- Record the sifaris details that decide the government rate.
- Collect the field-visit fee on site, by cash or QR.
- Work fully offline — your captures queue and upload when you reconnect.
- Set your own availability, and message the Case Manager.
What you can’t do
- You can’t see the case price — only the field-visit fee you collect.
- You see only your own assigned visits, and you talk only to the Case Manager.
- You see the client’s name and number from the moment you are assigned until you mark the survey complete — then it is hidden again. Your own captures stay with you.
Getting in
Open the Jagga Surveyor app and sign in. A connection status (Synced or offline) is always shown at the top.
Your screens, step by step
1. Today’s visits — your route
Your home screen lists the day’s visits in order, with the time window, a status, the fee, and any note the Case Manager left.
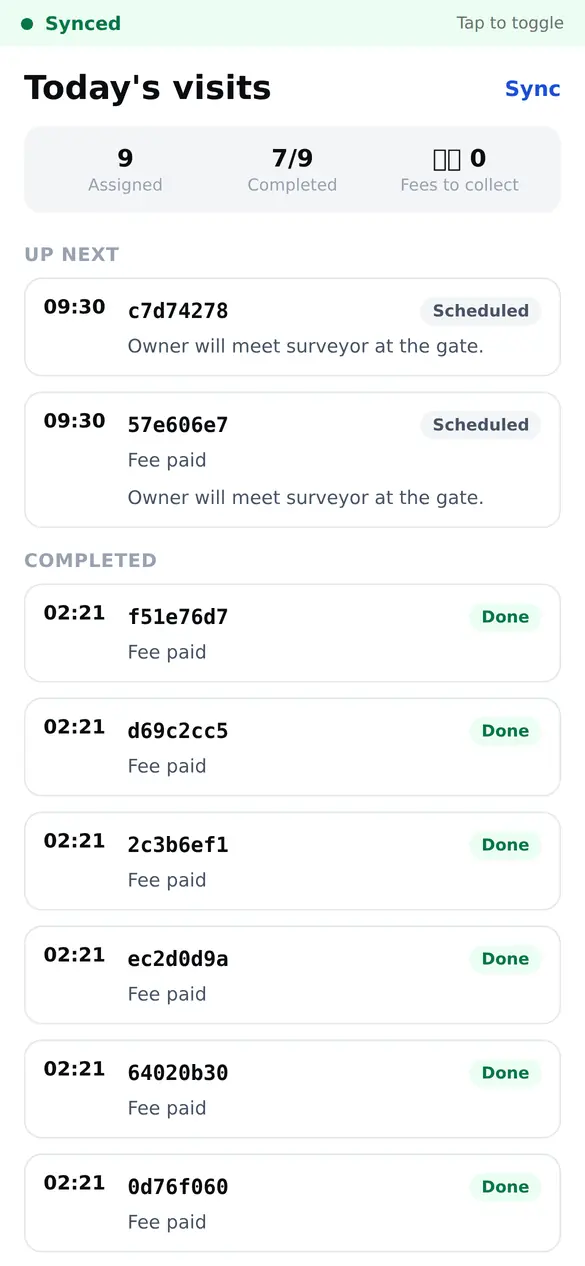
- The strip shows Assigned, Completed and Fees to collect.
- Up next holds your scheduled visits. Completed visits show Fee paid or Done.
- Tap a visit to open it.
2. The visit — start, then capture
Opening a visit shows its details and a Start the visit card.
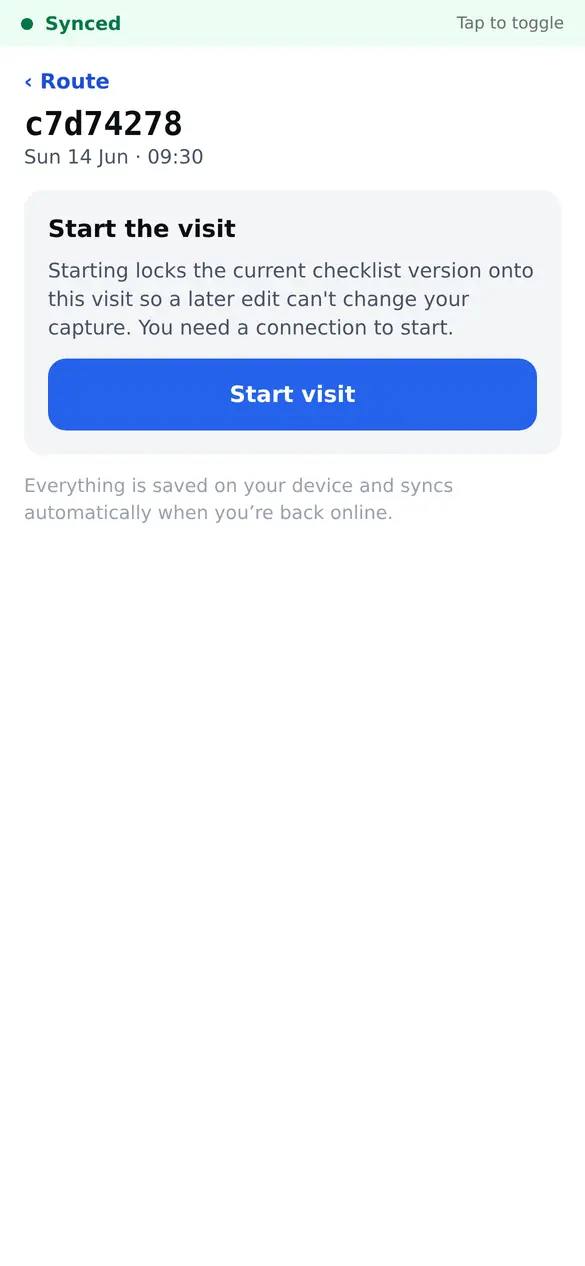
- Starting locks the current checklist version onto this visit, so a later edit to the form cannot change what you captured. You need a connection to start — after that you can work with no signal at all.
- Work through the checklist: check items, take photos, record measurements.
- Every photo must carry its GPS location and time. A photo with no geotag is refused.
3. The steps inside a visit
A visit is a sequence, and each step has its own screen:
- 1Start — locks the form version. Needs a connection.
- 2Photos — geotagged, each with its own upload progress.
- 3Documents — capture what the owner hands you.
- 4Sifaris — the road-access certificate details. This is what decides the government rate.
- 5Fee — collect by cash or QR, if it is due.
- 6Declare the fee — a required step, not a checkbox. You must say what happened to the money.
- 7Done — the visit is marked complete.
4. The sifaris step — the one that moves the money
The Ghar-Bato Sifaris is the ward office’s letter certifying what road the property has access to. Its classification is what the government land rate is keyed to, so this step matters more than its size suggests.
You record the booklet serial number, the classification code, the issue date, the former (saabik) VDC, whether the plot is in a town-development plan, what the plot adjoins, and whether the trace map shows a road the sifaris did not certify.
Every question here has three possible states: Not asked, and the real answers — including none or no. “Not asked” and “no” are different findings and the office needs to tell them apart, so leave it alone rather than guessing. This step never blocks you: it tells you plainly what the office will still be missing, and lets you finish.
5. Declaring the fee
If you were sent to collect a fee, finishing the visit asks you what happened to it: cash in hand, the client paid by QR, or nothing collected. Choosing nothing collected will not submit without a reason in your own words. This is a step you walk through, not a box you tick.
6. Sync — your safety net
The Sync screen shows your connection state and the outbox of anything waiting to upload.
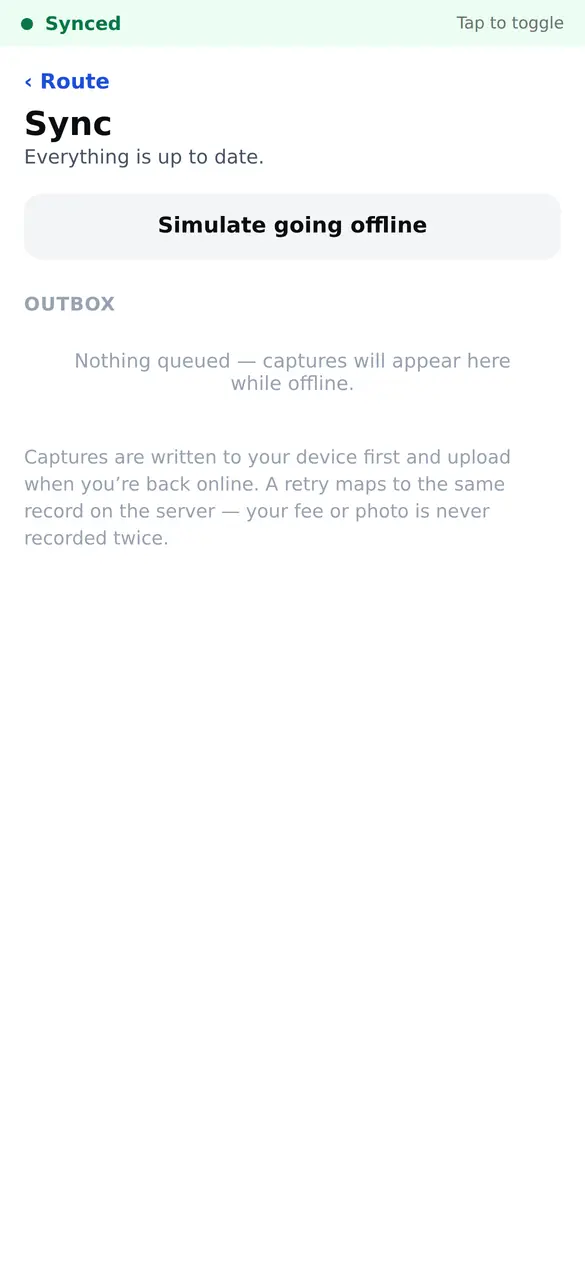
- When you are online it reads “Everything is up to date.”
- Anything captured offline sits in the Outbox and uploads by itself when you reconnect.
- Each queued photo shows its own progress, and a failed one can be retried on its own.
- Use Simulate going offline to practise capturing with no connection.
Tips and gotchas
- Capture first, worry about signal later. Everything is written to your phone straight away. Losing signal never loses your work.
- A retry never double-records. If an upload retries, it lands on the same record on the server. Your fee or your photo is never recorded twice.
- Money can never be discarded. If a payment you recorded is stuck, the app offers you exactly two choices: Retry, or Report to the Case Manager. There is no “dismiss” and no “discard”, at any size or state, because the cash is real and somebody still owes it. The stuck item names the amount and says so.
- Very old money entries wait for a human. If a payment you captured is more than about a month old by the time it syncs, it is accepted but held until finance or the Case Manager confirms it with a reason. Until then it counts towards nothing.
- Keep the owner informed through the Case Manager. You do not message the client directly.
Last reviewed 2026-09-08.